


Your Guide to Classic Caravan Restoration
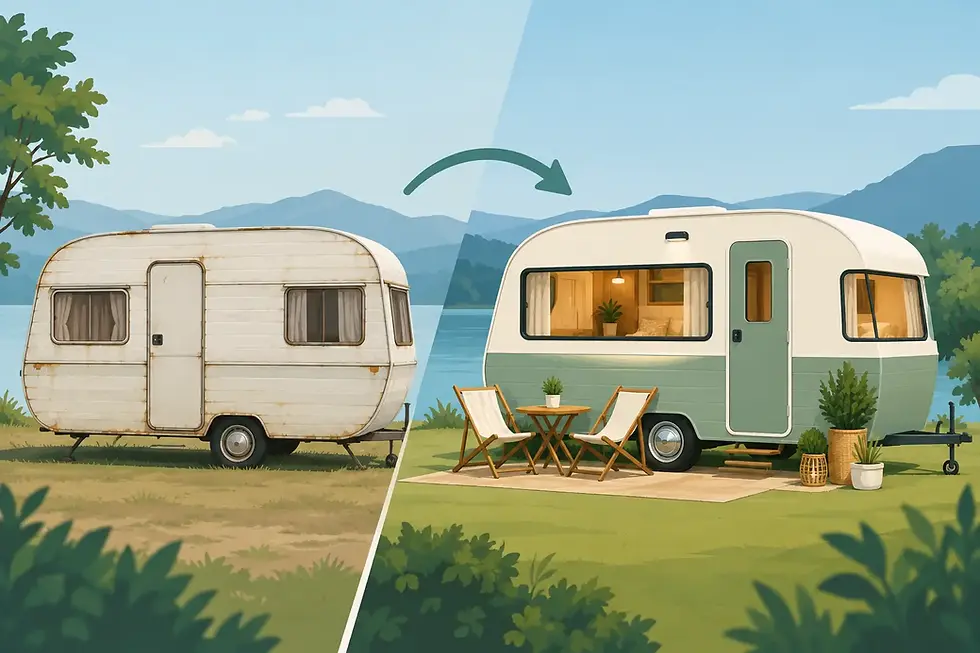
A classic caravan can look charming from the footpath while hiding years of water ingress, tired wiring and soft timber behind its walls. That is why a guide to classic caravan restoration should begin well before choosing paint colours or new cushions. The best result protects the character that made you fall for the van in the first place, while making it safe, dry and genuinely enjoyable to use.
For some owners, that means returning a beloved retro van to period-style glory. For others, it means creating a bright onsite retreat, a comfortable touring caravan or a mobile bar that can handle regular events. The scope is different, but the order of work remains the same: assess honestly, repair properly, then make the space your own.
Start with an honest restoration assessment
Before committing to a full renovation, inspect the caravan from the chassis up. Cosmetic work can transform a dated interior, but it cannot solve a rotten floor, a leaking roof seam or unsafe electrical work. A thorough assessment gives you a realistic picture of what is worth restoring and what needs rebuilding.
Pay close attention to the usual problem areas: roof joins and corner moulds, windows, door frames, awning tracks, wheel arches and the lower edges of exterior cladding. Bubbling wall linings, a musty smell, discoloured ceiling panels and soft spots underfoot can all point to past or current water damage. A caravan may be dry on inspection day and still have significant concealed deterioration.
Underneath, check the drawbar, chassis, suspension mounts, brake components and floor framing for corrosion or damage. If the van has been parked for years, tyres, wheel bearings, brakes and gas systems should never be assumed road-ready. Age alone does not make a caravan unsafe, but it does make careful inspection essential.
It is also worth deciding early whether the caravan will travel. An onsite van allows more freedom with layout, weight and fixed services. A touring caravan needs careful attention to weight distribution, legal requirements and secure cabinetry, appliances and fittings. This one decision can shape the entire design.
Set a budget around the hidden work first
Classic caravan restoration costs vary because every van tells a different story once linings and flooring come out. A tidy, dry shell may need resealing, painting, cabinetry updates and electrical improvements. A van with long-term leaks may require sections of framing, floor and cladding to be rebuilt before the visible renovation can begin.
A sensible budget separates essential repair work from the features you would love to add. Structural repairs, resealing, brakes, tyres, plumbing, gas and electrical safety belong in the essential category. Items such as a new awning, custom upholstery, premium benchtops or a retro fridge can be planned once the foundation is sound.
Allow a contingency for discoveries. This is not a sign that a workshop is being vague. It is the practical reality of older caravans, where damage can sit behind a wall lining or beneath vinyl flooring. Clear communication matters here. You should understand what has been found, why it needs attention and what the options are before additional work proceeds.
At Palace Caravans, restoration planning is treated as a conversation, not a one-size-fits-all package. A clear brief, practical advice and staged decisions help owners put money where it will make the greatest difference to safety, usability and finish.
Repair the shell before renovating the interior
The most satisfying transformations often begin with the least glamorous jobs. Resealing roof joins, replacing damaged timber, repairing exterior cladding and fixing window leaks should happen before fresh wall panels, cabinetry or flooring are installed. Otherwise, a beautiful new interior can be compromised by the next heavy downpour.
Exterior repairs may include removing old sealants, repairing impact or hail damage, replacing damaged aluminium sections, rebuilding corners and respraying faded panels. A quality exterior paint job can completely change a van's presence, but preparation is what determines whether the finish lasts. Surface repairs, rust treatment, correct priming and careful masking are all part of the job.
When dealing with water damage, resist the temptation to patch only the visible stain. Moisture travels, especially through timber frames and insulation. The repair needs to identify the entry point, remove compromised materials and rebuild the affected area before the caravan is sealed again.
Plan the layout around how you will actually use it
A classic caravan interior is compact, which makes every centimetre count. Start by considering the daily routine. Will two people be cooking inside? Does the dinette need to become a bed? Is there enough storage for linen, outdoor gear and food? Will the van be a permanent guest space, a weekend escape or a business asset?
Older layouts can be surprisingly efficient, but dark overhead cupboards, bulky seating and awkward beds often make a small caravan feel smaller. Removing or reshaping selected cabinetry can improve light and movement, provided structural support and weight are considered. Custom cabinetry is especially valuable when standard flat-pack solutions waste space or do not suit curved walls.
For an onsite caravan, a larger lounge, practical kitchenette and extra storage may be the priority. For touring, lightweight materials, secure latches and balanced loading matter more. For a mobile bar, the workflow behind the counter, service access, refrigeration, power requirements and branding all need to work together. A clever layout is not only about appearance. It should make the caravan easier to live in or operate.
Modernise services without losing the vintage feel
The charm of a classic caravan does not depend on retaining outdated wiring, old appliances or inadequate lighting. Modern 12V systems, solar, battery storage, air-conditioning and efficient appliances can make a vintage van far more comfortable while keeping its original personality.
Electrical work should be planned as part of the renovation, not added at the end. Think about where you will charge devices, whether you need off-grid capability, how much refrigeration you require and where lighting will be most useful. Warm LED lighting can suit a retro interior beautifully, while task lighting over the kitchen and reading lights near the bed make the space more functional.
Any 240V work needs to be carried out correctly by appropriately licensed professionals. The same care applies to gas and plumbing. These systems are easy to overlook when your attention is on finishes, yet they are central to a safe, reliable caravan.
Choose finishes that work hard
Classic caravan interiors benefit from colour and personality, but finishes need to cope with heat, movement, sand, wet towels and plenty of cleaning. Lighter colours, considered lighting and reflective surfaces can make a narrow van feel open without turning it into a bland white box.
Keep a few original details where they are in good condition and add genuine character. That might be a curved cupboard profile, a vintage window shape, original external stripes or a classic front panel. Pair them with durable flooring, easy-clean wall surfaces and quality hardware. The goal is not to make an old caravan look brand new. It is to make it feel cared for, functional and unmistakably yours.
Fabric selection is another practical decision. Upholstery should suit how the van will be used. A family tourer needs hard-wearing, easy-care material, while an occasional onsite retreat may allow for softer, more decorative fabrics. In either case, use colours and textures that complement the era rather than competing with it.
Know when a professional restoration is the wiser path
There is plenty an owner can do, from collecting design ideas to choosing handles, fabrics and paint colours. But structural repairs, leak diagnosis, chassis concerns, electrical work and major cabinetry changes can quickly exceed the scope of a weekend project. Poor repairs may create bigger costs later, especially where water damage or road safety is involved.
A specialist workshop can also coordinate the sequence of work properly: strip-out, repair, reseal, services, linings, cabinetry, paint and final fit-off. That order prevents rework and gives the finished caravan a more polished result. Ask to see completed projects, discuss your intended use clearly and request an estimate that distinguishes necessary repairs from optional upgrades.
Your classic caravan does not need to be flawless or museum-perfect to be special. It needs to be dry, safe, useful and full of the details that make you happy to open the door. Give the hidden work the same care as the visible transformation, and your little Palace can be ready for many more memorable weekends.


Comments