


When a Caravan Exterior Respray Is Worth It
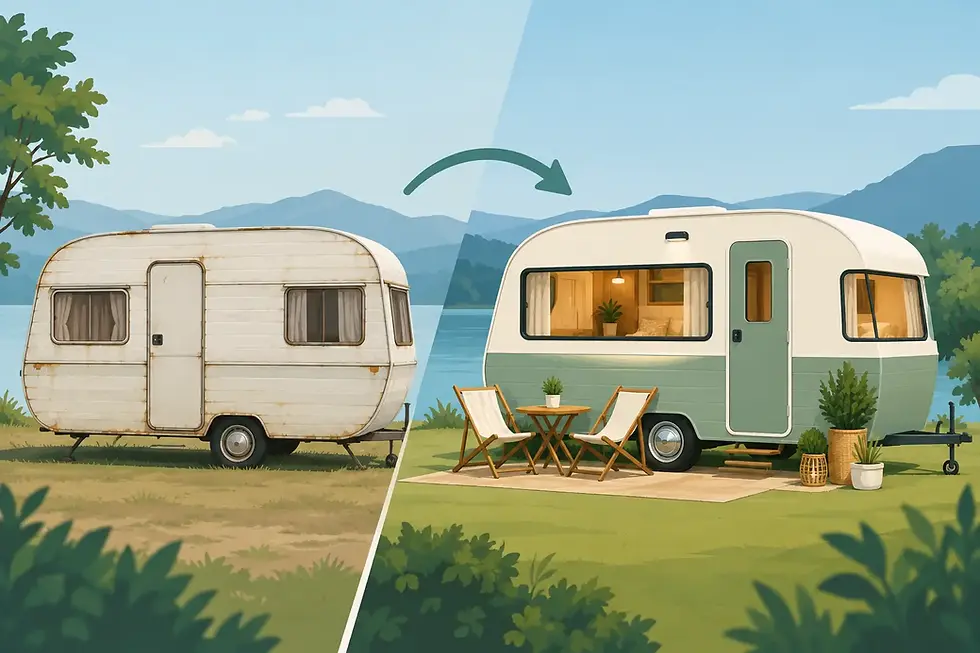
A faded stripe, chalky paintwork or mismatched repair panel can make an otherwise loved caravan feel tired before you have even opened the door. A caravan exterior respray is one of the most visible ways to bring your little Palace back to life, but the best results are never just about choosing a fresh colour. They start with honest assessment, careful preparation and repairs that are completed properly before paint goes anywhere near the body.
For owners of vintage, retro and classic vans, a respray can restore the character that first caught your eye. For a newer caravan with accident, hail or sun damage, it can return the exterior to a clean, consistent finish. The right approach depends on what sits beneath the surface.
What a caravan exterior respray can fix
A professional respray can dramatically improve oxidation, faded paint, peeling clear coat, superficial scuffs, old decals, patchy previous repairs and colour inconsistencies between panels. It can also be the finishing stage of a larger renovation, tying new windows, mouldings, hatches and exterior fittings into one considered look.
It is especially worthwhile when the caravan is structurally sound but visually dated. Many onsite vans still have plenty of practical life left in them, yet their exterior has weathered through years of coastal air, harsh sun and general wear. A bright, clean finish can make the entire van feel newer and more inviting, particularly when paired with an interior refit.
A respray is not, however, a shortcut around leaks, rust, delamination or impact damage. Paint can make a surface look excellent, but it cannot repair deteriorated timber framing, water-affected wall sections or loose cladding. If there is bubbling, softness around openings, staining inside, corrosion or movement in a panel, those issues need attention first. This is where a workshop inspection is valuable: it establishes whether the job is cosmetic, restorative or part of a broader repair plan.
Preparation makes the finish last
The visible spraying stage is only one part of the work. Most of the time and care in a quality caravan exterior respray is spent preparing the van so the finish has a stable, clean surface to bond to.
The process generally begins by washing and decontaminating the exterior, then assessing every panel, join, seam, door, hatch and moulding. Old decals and loose coatings may need removal. Damaged areas are repaired, dents are addressed where practical, and surfaces are sanded to create an even base. Depending on the construction of the caravan, this may involve aluminium cladding, fibreglass, composite panels or a combination of materials, each with different preparation requirements.
Seals and fittings deserve particular attention. A caravan has far more joins and openings than a typical vehicle: windows, roof vents, access doors, awning rails, corner moulds, lights and trim all create potential weak points. If resealing or replacement work is required, it should be planned alongside the paintwork rather than treated as an afterthought. A beautiful new finish loses its appeal quickly if water finds its way behind it.
Masking is another sign of careful workmanship. Doors, windows, trims and accessories need to be protected properly so paint lines are crisp and the completed van looks intentional, not hurried. When components are removed and refinished or replaced where appropriate, the final result is usually cleaner than simply painting around tired fittings.
Choosing colours that suit your van
Colour is where a respray becomes personal. Some owners want to return a vintage caravan to its original era with soft creams, two-tone combinations and classic striping. Others prefer a cleaner, contemporary look that suits a renovated interior, an onsite location or a business brand.
There is no single right choice. A bright white or pale neutral can make a compact van feel fresh, reflect heat and work well with modern black accessories. Deeper colours, heritage greens, warm neutrals or retro pastels can create more personality, though darker tones may show dust, scratches and heat more readily. If the caravan spends long periods in direct sun, colour selection should consider how the finish will look and perform over time, not only how it appears on a colour chart.
For mobile bar and event conversions, the exterior is part of the business presentation. A respray can create a polished backdrop for signage, serving windows and custom detailing. In those cases, colour placement, trim contrast and practical durability all matter. The van needs to photograph well, but it also needs to handle travel, set-up days and regular cleaning.
Full respray or targeted exterior repairs?
Not every caravan needs a complete repaint. If the damage is limited to one side, a corner or a replaced panel, targeted repairs and colour matching may be the more sensible option. This can be particularly relevant for insurance repairs after an accident or hail event, where the scope of work is based on assessed damage.
A full respray becomes more appealing when the original finish is faded across multiple panels, repairs are visible in several places, old graphics have left outlines, or you are changing the overall style of the caravan. It can also make sense when renovation work is already underway and exterior components are being repaired, replaced or resealed.
The trade-off is budget and downtime. A full exterior transformation involves more materials, preparation and workshop time than a localised repair. But choosing a cheaper patch-up solution for widespread deterioration can sometimes lead to a result that still looks uneven from a few steps back. A clear discussion about your plans for the van helps determine where the investment is best spent. Are you keeping it for family holidays, setting it up permanently, selling it, or creating a commercial asset? The answer changes the ideal scope.
Questions to ask before booking the work
Before committing to an exterior repaint, it helps to be clear about the condition of the caravan and what you want the finished project to achieve. Ask whether any water damage, panel movement or corrosion has been found, and whether resealing should be included. Find out which trims, lights, hatches or decals will be removed, retained or replaced, as these details affect both appearance and cost.
It is also worth discussing how the colour will work with the roof, awning, wheels, windows and interior style. A well-planned renovation feels connected from the first exterior glance through to the cabinetry, flooring and lighting inside. If you are working to a defined budget, prioritise structural and weatherproofing work first, then build the cosmetic scope around it.
Good communication matters throughout the job. Caravan restorations often uncover hidden issues once trims or panels come off, especially on older vans. A workshop that explains the findings, provides practical options and keeps you updated gives you confidence that decisions are being made with the long-term condition of the caravan in mind.
Caring for the new finish
Once the work is complete, regular gentle washing is the simplest way to protect it. Rinse off road grime, tree sap, salt and bird droppings rather than allowing them to sit on the surface. Avoid aggressive cleaners or abrasive pads, particularly around decals, seals and joins.
Storage makes a difference too. Covered parking is ideal, but if that is not available, regular cleaning and suitable protection from prolonged weather exposure will help preserve the finish. Keep an eye on sealant lines, mouldings and fittings during routine checks. Catching a small issue early is far easier than dealing with water damage later.
At Palace Caravans, exterior painting is approached as part of the whole caravan, not a quick coat over old problems. Whether your van needs insurance repairs, a vintage restoration or a complete new look, the most satisfying result is one that feels true to the way you want to use and enjoy your little Palace for years to come.


Comments